Maximizing kitchen space can be a challenge, but with the right solutions, it can be achieved efficiently. One practical approach is installing toe kick storage, which provides additional room for kitchen essentials without compromising the aesthetic appeal of your kitchen.
This comprehensive installation guide is designed to walk you through the process, from preparation to completion. By following these steps, you’ll be able to successfully integrate toe kick drawer storage into your kitchen, enhancing both its functionality and organization.
Key Takeaways
- Understand the benefits of toe kick storage in maximizing kitchen space.
- Learn the step-by-step process of installing toe kick drawer storage.
- Discover tips for ensuring a successful installation.
- Explore how toe kick storage can enhance kitchen organization.
- Gain insights into maintaining your newly installed storage.
Introduction to Toe Kick Drawer Storage
Toe kick drawer storage is an innovative way to utilize the often-wasted space under kitchen cabinets, providing homeowners with additional storage for kitchen essentials.
What is Toe Kick Drawer Storage?
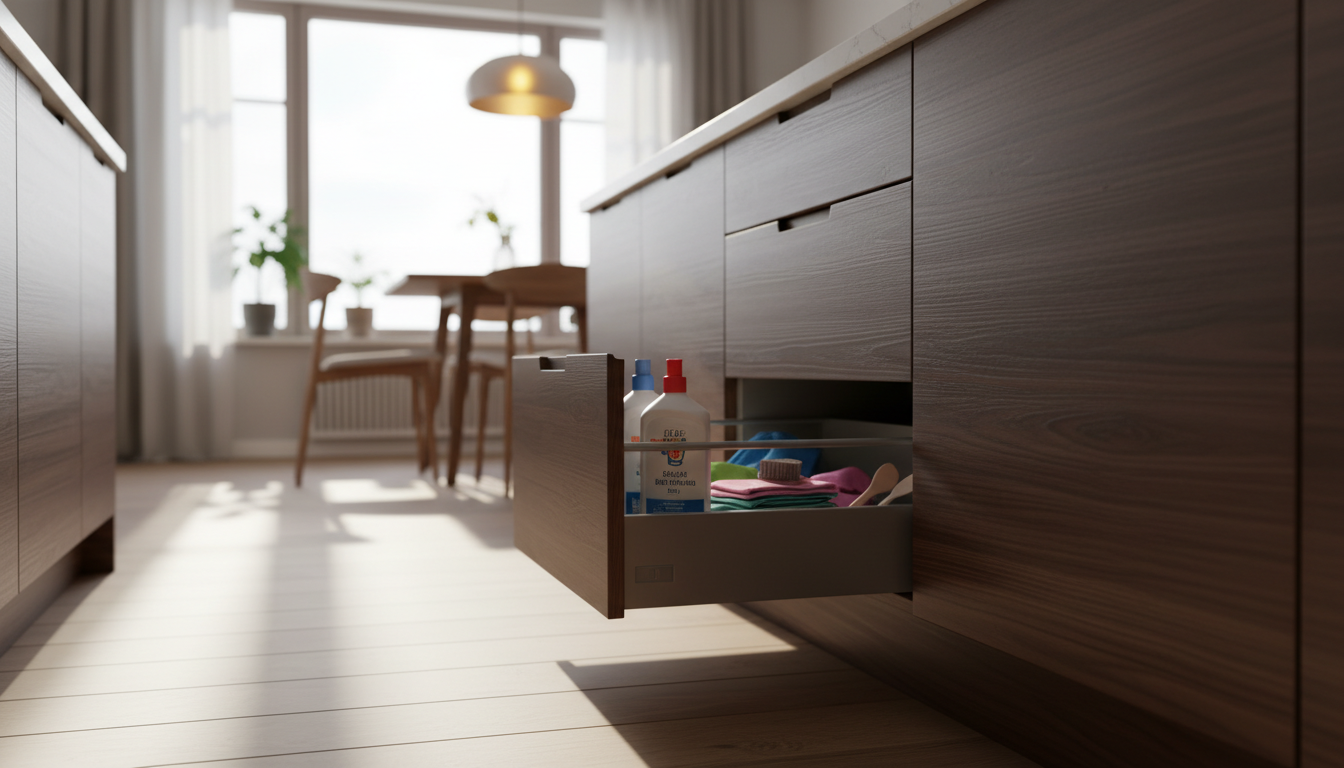
Toe kick drawer storage refers to the drawers or storage units installed in the toe kick area of kitchens. This area, typically between the floor and the bottom of the kitchen cabinets, is often unused. By installing toe kick drawers, homeowners can capitalize on this space for storing items like kitchen utensils, cleaning supplies, or cookbooks.
According to a study, optimizing kitchen storage can significantly enhance the overall kitchen experience. “A well-organized kitchen not only improves functionality but also boosts the home’s value,” as noted by a leading interior design expert.
Benefits of Toe Kick Drawer Storage
The benefits of toe kick drawer storage are multifaceted. Firstly, it provides additional storage, helping to declutter the kitchen. Secondly, it enhances the kitchen’s functionality by making stored items easily accessible. Lastly, it can be a DIY project or professionally installed, offering flexibility for homeowners.
| Benefits | Description |
|---|---|
| Additional Storage | Utilizes the under-cabinet space for storing kitchen essentials. |
| Enhanced Functionality | Makes stored items easily accessible, improving kitchen workflow. |
| Flexibility | Can be installed as a DIY project or by professionals. |
By understanding the concept and benefits of toe kick drawer storage, homeowners can make informed decisions about enhancing their kitchen’s storage and functionality.
Tools and Materials Needed
The success of your toe kick drawer installation project heavily relies on having the right tools and materials at your disposal. A well-prepared installation ensures a smooth and efficient process, resulting in a functional and aesthetically pleasing toe kick storage system.
Essential Tools for Installation
To install toe kick drawer storage effectively, you’ll need a set of essential tools. These include:
- A tape measure for accurate measurements
- A level to ensure proper alignment
- A drill with various drill bits for making holes for screws
- A screwdriver set for driving screws
- A saw or jigsaw for cutting wood or other materials as needed
- A sander for smoothing out surfaces
- Clamps to hold pieces in place while gluing or screwing
Having these tools on hand will help you tackle the installation with confidence and precision.
Recommended Materials for Effectiveness
The materials you choose for your toe kick drawer storage will impact its durability and functionality. Some recommended materials include:
| Material | Description | Benefits |
|---|---|---|
| Drawer Slides | Soft-close or full-extension slides | Smooth operation, easy access |
| Drawer Frame | Plywood or MDF | Durable, cost-effective |
| Finishing Materials | Paint, stain, or veneer | Aesthetic appeal, protection |
Selecting the right materials will not only enhance the look of your toe kick storage but also ensure it remains functional over time.
By combining the right tools with appropriate materials, you’ll be well on your way to creating a toe kick drawer storage system that meets your needs and complements your kitchen design.
Preparing for Installation
Proper preparation is the key to a successful toe kick drawer installation. It involves understanding the space available and planning accordingly.
Measuring Your Kitchen Space
To begin, accurately measuring your kitchen space is crucial. You need to determine the toe kick drawer dimensions that will fit your available space. Measure the width of the area under your kitchen cabinets, taking into account any obstructions like plumbing or electrical outlets.
- Measure the width of the toe kick area.
- Check for any obstructions.
- Decide on the depth of your drawer based on your needs.
Designing Your Toe Kick Area
Once you have your measurements, it’s time to design your toe kick area. Consider what you want to store in your toe kick drawer. This will help you decide on the size and layout of your drawer. For a DIY toe kick drawer installation, you can customize the design to fit your specific needs.
Some key considerations include:
- The type of items you plan to store.
- The material you will use for the drawer.
- The style and finish that matches your kitchen.
By carefully measuring your space and designing your toe kick area, you’ll be well-prepared for a successful installation. Remember, a well-designed toe kick drawer can significantly enhance your kitchen’s functionality.
Step-by-Step Installation Process
The toe kick drawer storage installation process is straightforward with the right guidance. To ensure a successful installation, follow these steps carefully.
Installing the Drawer Frame
Begin by assembling the drawer frame according to the manufacturer’s instructions. Ensure all parts are included and that you have the necessary tools.
- Use a tape measure to verify the dimensions.
- Check that the frame is square by measuring the diagonals.
- Secure the frame components together using the provided hardware.
Attaching the Drawer Slides
Attaching the drawer slides is a critical step for the smooth operation of your toe kick drawer.
- Position the slides on the drawer frame as instructed by the manufacturer.
- Ensure the slides are level and securely attached.
- Test the slides by opening and closing them several times.
Securing the Toe Kick Drawer
Once the drawer frame and slides are installed, it’s time to secure the toe kick drawer in place.
| Step | Description |
|---|---|
| 1 | Align the drawer with the cabinet opening. |
| 2 | Secure the drawer to the cabinet floor or wall as required. |
| 3 | Tighten all screws and check the drawer’s operation. |
By following these steps, you’ll be able to complete your toe kick drawer storage installation with confidence. Remember to test the drawer several times to ensure it operates smoothly.
Aligning the Drawer with Cabinets
When installing a toe kick drawer, ensuring it is properly aligned with the surrounding cabinets is key to a successful installation. This alignment is not just about aesthetics; it also plays a significant role in the functionality of the drawer.
Ensuring Level Installation
To ensure a level installation, start by double-checking the floor’s levelness and the cabinets’ alignment. Use a level tool to verify that the floor is even and that the cabinets are properly aligned. If necessary, make adjustments to the cabinets or the floor before proceeding with the toe kick drawer installation.
Steps to Ensure Level Installation:
- Check the floor’s levelness using a level tool.
- Verify the alignment of the cabinets.
- Make any necessary adjustments to the cabinets or floor.
Adjusting for Optimal Functionality
Once the toe kick drawer is installed, check its alignment with the cabinets and ensure it operates smoothly. If the drawer is not aligned properly, adjust the drawer slides or the drawer frame as needed.
Tips for Adjusting the Drawer:
| Adjustment | Purpose | Action |
|---|---|---|
| Drawer Slides | Ensure smooth operation | Adjust the slides to align with the cabinet |
| Drawer Frame | Proper alignment | Adjust the frame to match the cabinet’s position |
By following these steps and tips, you can achieve a perfectly aligned toe kick drawer that enhances both the look and functionality of your kitchen.
Finishing Touches
With the drawer frame installed, the next crucial step is to add the finishing elements that will personalize your toe kick storage to match your kitchen’s style. This involves two key aspects: adding drawer fronts and deciding on painting or staining options.
Adding Drawer Fronts
Drawer fronts are not just a cosmetic addition; they play a significant role in the overall aesthetic of your kitchen. When selecting drawer fronts for your toe kick storage, consider materials and designs that complement your existing cabinetry. For a cohesive look, you can choose from a variety of finishes, such as:
- Wooden finishes: Oak, maple, or cherry wood can add warmth and character to your kitchen.
- Laminate or veneer: These offer durability and a wide range of colors and patterns.
- Metal or glass: For a modern or sleek look, metal or glass drawer fronts can be an excellent choice.
Ensure that the drawer fronts you choose are proportionate to the size of your toe kick drawer and align with the overall design theme of your kitchen.
Painting or Staining Options
Painting or staining your toe kick drawer storage can significantly enhance its appearance, making it blend in or stand out in your kitchen. Here are some considerations for painting or staining:
- Match your cabinets: To create a seamless look, match the color and finish of your toe kick drawer to your kitchen cabinets.
- Contrast for visual interest: Choose a contrasting color to make your toe kick drawer a design feature.
- Consider the material: Ensure that the paint or stain you choose is suitable for the material of your drawer fronts.
For a professional finish, consider applying a clear coat to protect the surface and make cleaning easier.

By carefully selecting and installing drawer fronts and applying an appropriate finish, you can enhance the functionality and aesthetic appeal of your toe kick drawer storage, making it a valuable addition to your kitchen.
Troubleshooting Common Issues
Common problems can arise during toe kick drawer installation, but knowing how to address them can save time and frustration. Being prepared for potential issues ensures a smoother DIY experience.
Drawer Misalignment Problems
Drawer misalignment is a common issue that can occur if the toe kick drawer dimensions are not accurately measured or if the installation is not level. To fix this, first, check that the drawer frame is properly aligned with the surrounding cabinets.
- Ensure the floor is level and the cabinets are properly secured.
- Adjust the drawer slides to compensate for any minor misalignments.
- If necessary, reposition the drawer frame to achieve a proper fit.
As popular DIY expert suggests, “A well-aligned drawer not only functions smoothly but also enhances the overall aesthetic of your kitchen.”
Handling Sticking or Stuck Drawers
Sticking or stuck drawers can be frustrating, but they are often resolved with simple adjustments. If your toe kick drawer is sticking, check the following:
- Verify that the drawer slides are clean and free of debris.
- Lubricate the slides with a silicone-based lubricant to improve gliding.
- Check if the drawer is overloaded, as excess weight can cause sticking.
Proper maintenance is key to preventing sticking issues. Regularly cleaning and lubricating the drawer slides can significantly improve the longevity and functionality of your toe kick drawer storage.
By being aware of these common issues and knowing how to troubleshoot them, you can ensure a successful DIY toe kick drawer installation. Remember, patience and attention to detail are crucial for achieving professional-looking results.
Maintenance Tips for Longevity
Maintaining your toe kick drawer storage is crucial for its longevity and functionality. By following a few simple maintenance tips, you can ensure that your storage solution continues to serve your needs effectively.
Regular Cleaning Techniques
Regular cleaning is essential to prevent dust and debris from accumulating in your toe kick drawer storage. Use a soft cloth or a vacuum cleaner with a gentle suction setting to remove any dirt or dust. For more thorough cleaning, a damp cloth can be used, but be sure to dry the area thoroughly to prevent moisture damage.
Cleaning Schedule: It’s a good idea to clean your toe kick drawer storage every 1-3 months, depending on usage.
| Cleaning Method | Frequency | Benefits |
|---|---|---|
| Soft Cloth or Vacuum | Monthly | Removes dust and debris |
| Damp Cloth | Quarterly | Deeper cleaning |
Lubricating Drawer Slides
Lubricating the drawer slides is another crucial maintenance task. It ensures that the drawers open and close smoothly, reducing wear and tear on the hardware. Use a silicone-based lubricant or a dry lubricant like wax or graphite to lubricate the slides.
Tip: Apply lubricant sparingly to avoid attracting dust, which can counteract the benefits of lubrication.
By incorporating these maintenance tips into your routine, you’ll be able to enjoy a well-functioning toe kick drawer storage system for years to come. Regular maintenance not only extends the life of your storage solution but also ensures that it continues to provide easy access to your kitchen essentials.
Enhancing Your Toe Kick Storage
Enhancing your toe kick storage is about more than just adding drawers; it’s about creating a more organized kitchen. By implementing thoughtful storage solutions, you can maximize the potential of this often-underutilized space.
Creative Uses for Additional Storage
The toe kick area offers a unique opportunity to add extra storage without compromising the aesthetic of your kitchen. Consider using this space for storing infrequently used kitchen gadgets or special occasion dishes. You can also utilize dividers or baskets to keep items like spices, cookbooks, or cleaning supplies organized and within easy reach.

Another creative approach is to design a custom toe kick storage system that complements your kitchen’s layout and style. This could involve installing adjustable shelves or drawers that can accommodate items of various sizes. By doing so, you’ll not only enhance the functionality of your kitchen but also add a touch of personalization.
Organizing Drawer Contents Effectively
Once you’ve installed your toe kick drawer, the next step is to organize its contents effectively. Start by categorizing items based on their frequency of use and type. For instance, you can dedicate a section for frequently used cookware and another for less frequently used items. Using drawer dividers or inserts can help maintain this organization and prevent clutter from building up.
To further optimize your toe kick storage, consider implementing a maintenance routine. Regularly cleaning out the drawer and reassessing its contents can help ensure that it remains a valuable and functional part of your kitchen. By keeping your toe kick drawer organized, you’ll save time and reduce stress when preparing meals.
Safety Considerations During Installation
The installation of toe kick drawer storage demands a focus on safety to prevent accidents. Ensuring a safe working environment is crucial for a successful DIY project.
Proper Handling of Tools and Materials
When handling tools and materials for your toe kick drawer installation, it’s essential to follow safety guidelines. Always wear protective gear, such as safety glasses and gloves, to prevent injuries. Make sure your workspace is well-lit and clear of clutter to avoid tripping hazards.
Proper tool handling is also vital. Familiarize yourself with the manufacturer’s instructions for each tool, and use them for their intended purposes. For instance, using a screwdriver as a pry bar can lead to accidents.
Ensuring Stability of Installed Drawers
Once your toe kick drawer is installed, ensuring its stability is crucial. Check that the drawer is level and securely attached to the cabinet or surrounding structure. This prevents the drawer from tipping or falling, which could cause injury or damage.
- Verify that the drawer slides are properly aligned and securely fastened.
- Test the drawer by opening and closing it several times to ensure smooth operation.
- Make any necessary adjustments to the drawer’s position or the slides to achieve optimal functionality.
By prioritizing safety during the installation of your toe kick drawer storage, you can enjoy your new storage solution with peace of mind, knowing that it’s both functional and safe.
DIY vs. Professional Installation
Deciding between a DIY installation and hiring a professional for your toe kick drawer storage depends on several factors, including your skill level and the project’s complexity.
Before making a decision, it’s crucial to evaluate your DIY skills and the specific requirements of your toe kick drawer storage project. This assessment will help you determine whether you can handle the installation yourself or if it’s better to seek professional help.
Evaluating Your Skill Level for DIY Projects
To determine if you’re ready for a DIY toe kick drawer installation, consider your experience with similar projects, your comfort with the necessary tools, and your ability to follow installation guides.
Key factors to consider:
- Previous DIY experience
- Familiarity with required tools
- Ability to follow instructions
When to Consider Hiring a Professional
If your project involves complex designs, precise measurements, or you’re unsure about any aspect of the installation, it may be wise to hire a professional.
Benefits of hiring a professional include:
- Guaranteed quality of work
- Time savings
- Avoidance of potential pitfalls
| Aspect | DIY Installation | Professional Installation |
|---|---|---|
| Cost | Generally lower upfront cost | Higher upfront cost, but includes labor |
| Time | Requires personal time and effort | Saves personal time |
| Quality | Dependent on individual skill | Guaranteed quality |
By carefully evaluating your DIY skills and the project’s demands, you can make an informed decision that ensures a successful toe kick drawer storage installation.
Conclusion and Final Thoughts
Installing toe kick drawer storage is a rewarding project that can significantly enhance your kitchen’s functionality and aesthetic appeal. By following this comprehensive toe kick drawer storage installation guide, you have gained the knowledge and confidence to tackle this project.
Key Takeaways
The key to a successful toe kick storage installation lies in careful planning, precise measurements, and attention to detail. Ensure you have the right tools and materials, and don’t hesitate to seek professional help if needed.
Starting Your Project
With the insights gained from this guide, you’re now ready to start your toe kick drawer storage installation. Remember to stay focused on the step-by-step process, and you’ll be enjoying your new storage space in no time. Effective toe kick storage installation can transform your kitchen into a more organized and efficient space.